DIY Flooring Installation – Step-by-Step Guide for Beginners
When it comes to transforming your home, few projects make as big an impact as new flooring. Whether you want the cozy feel of carpet, the timeless look of hardwood, or the modern appeal of vinyl planks, installing your own flooring can save money and give your space a personal touch. The good news is that DIY flooring installation is easier than it sounds — even for beginners. With the right tools, preparation, and a clear process, you can achieve professional-looking results without hiring a contractor.
Understanding DIY Flooring Installation
Before starting your flooring project, it’s important to understand what DIY flooring installation really means. This process involves removing old flooring, preparing the subfloor, and installing your new material — whether it’s laminate, vinyl, hardwood, or tile — all by yourself. While some types of flooring require more skill, many modern options like vinyl planks and laminate are designed with easy click-and-lock systems, making them beginner-friendly.

DIY flooring not only saves you money on labor costs but also gives you full control over the design, materials, and finish. You can take your time, work at your own pace, and enjoy the satisfaction of seeing your hard work come to life.
Benefits of DIY Flooring Installation
Doing your own flooring installation offers several benefits. The first is cost savings. Professional installation can sometimes cost as much as the flooring material itself, but when you handle the project, you only pay for materials and tools. Second, it allows for customization — you can choose patterns, layouts, and finishes that perfectly fit your style. Finally, the sense of accomplishment after finishing a DIY flooring project is unmatched. It enhances your home’s value while giving you the confidence to tackle more home improvement tasks in the future.
Choosing the Right Type of Flooring
Before diving into installation, decide which type of flooring suits your space. Not all floors are equal when it comes to ease of installation and maintenance.
Vinyl Plank Flooring
Vinyl plank flooring is one of the easiest options for DIY flooring installation. It’s waterproof, durable, and perfect for high-traffic areas or rooms like kitchens and bathrooms. The click-and-lock design eliminates the need for glue or nails.
Laminate Flooring
Laminate offers a realistic wood or stone look at an affordable price. Like vinyl, most laminate floors feature tongue-and-groove systems that click together easily. However, laminate is not ideal for areas with high moisture.
Engineered Hardwood
Engineered hardwood is a more sophisticated choice that combines the beauty of real wood with better moisture resistance. It’s installed using either a floating system, glue-down, or nail-down method.
Ceramic or Porcelain Tile
Tile flooring offers long-lasting durability and a polished finish, but it requires more precision, especially when cutting tiles and applying grout. It’s suitable for bathrooms, kitchens, and entryways.
Preparing for DIY Flooring Installation
Preparation is key to achieving professional results. Before starting, gather all necessary tools and materials, and prepare your space thoroughly.
Gather Tools and Materials
Essential tools include a measuring tape, utility knife, spacers, a tapping block, a rubber mallet, a level, and a saw for cutting planks or tiles. You’ll also need underlayment if your flooring type requires it, along with safety gear such as gloves and knee pads.
Measure Your Room
Accurate measurements are crucial. Measure the length and width of your room to calculate square footage, then add an extra 10% for waste and cutting errors.
Prepare the Subfloor
Your subfloor should be clean, dry, and level. Remove old flooring, vacuum debris, and repair any uneven areas. If necessary, install a moisture barrier or underlayment to protect against dampness and noise.
Acclimate the Flooring
Most flooring materials need to acclimate to room temperature and humidity. Leave them in the room for 48 to 72 hours before installation to prevent expansion or contraction after they’re installed.
DIY Flooring Installation
Once your room is ready, it’s time to start the DIY flooring installation process.
Plan the Layout
Begin by deciding the direction you want the planks or tiles to run. Typically, flooring looks best when laid parallel to the longest wall or the main source of natural light. Dry-fit a few planks to see how they align and ensure that end pieces are not too short.
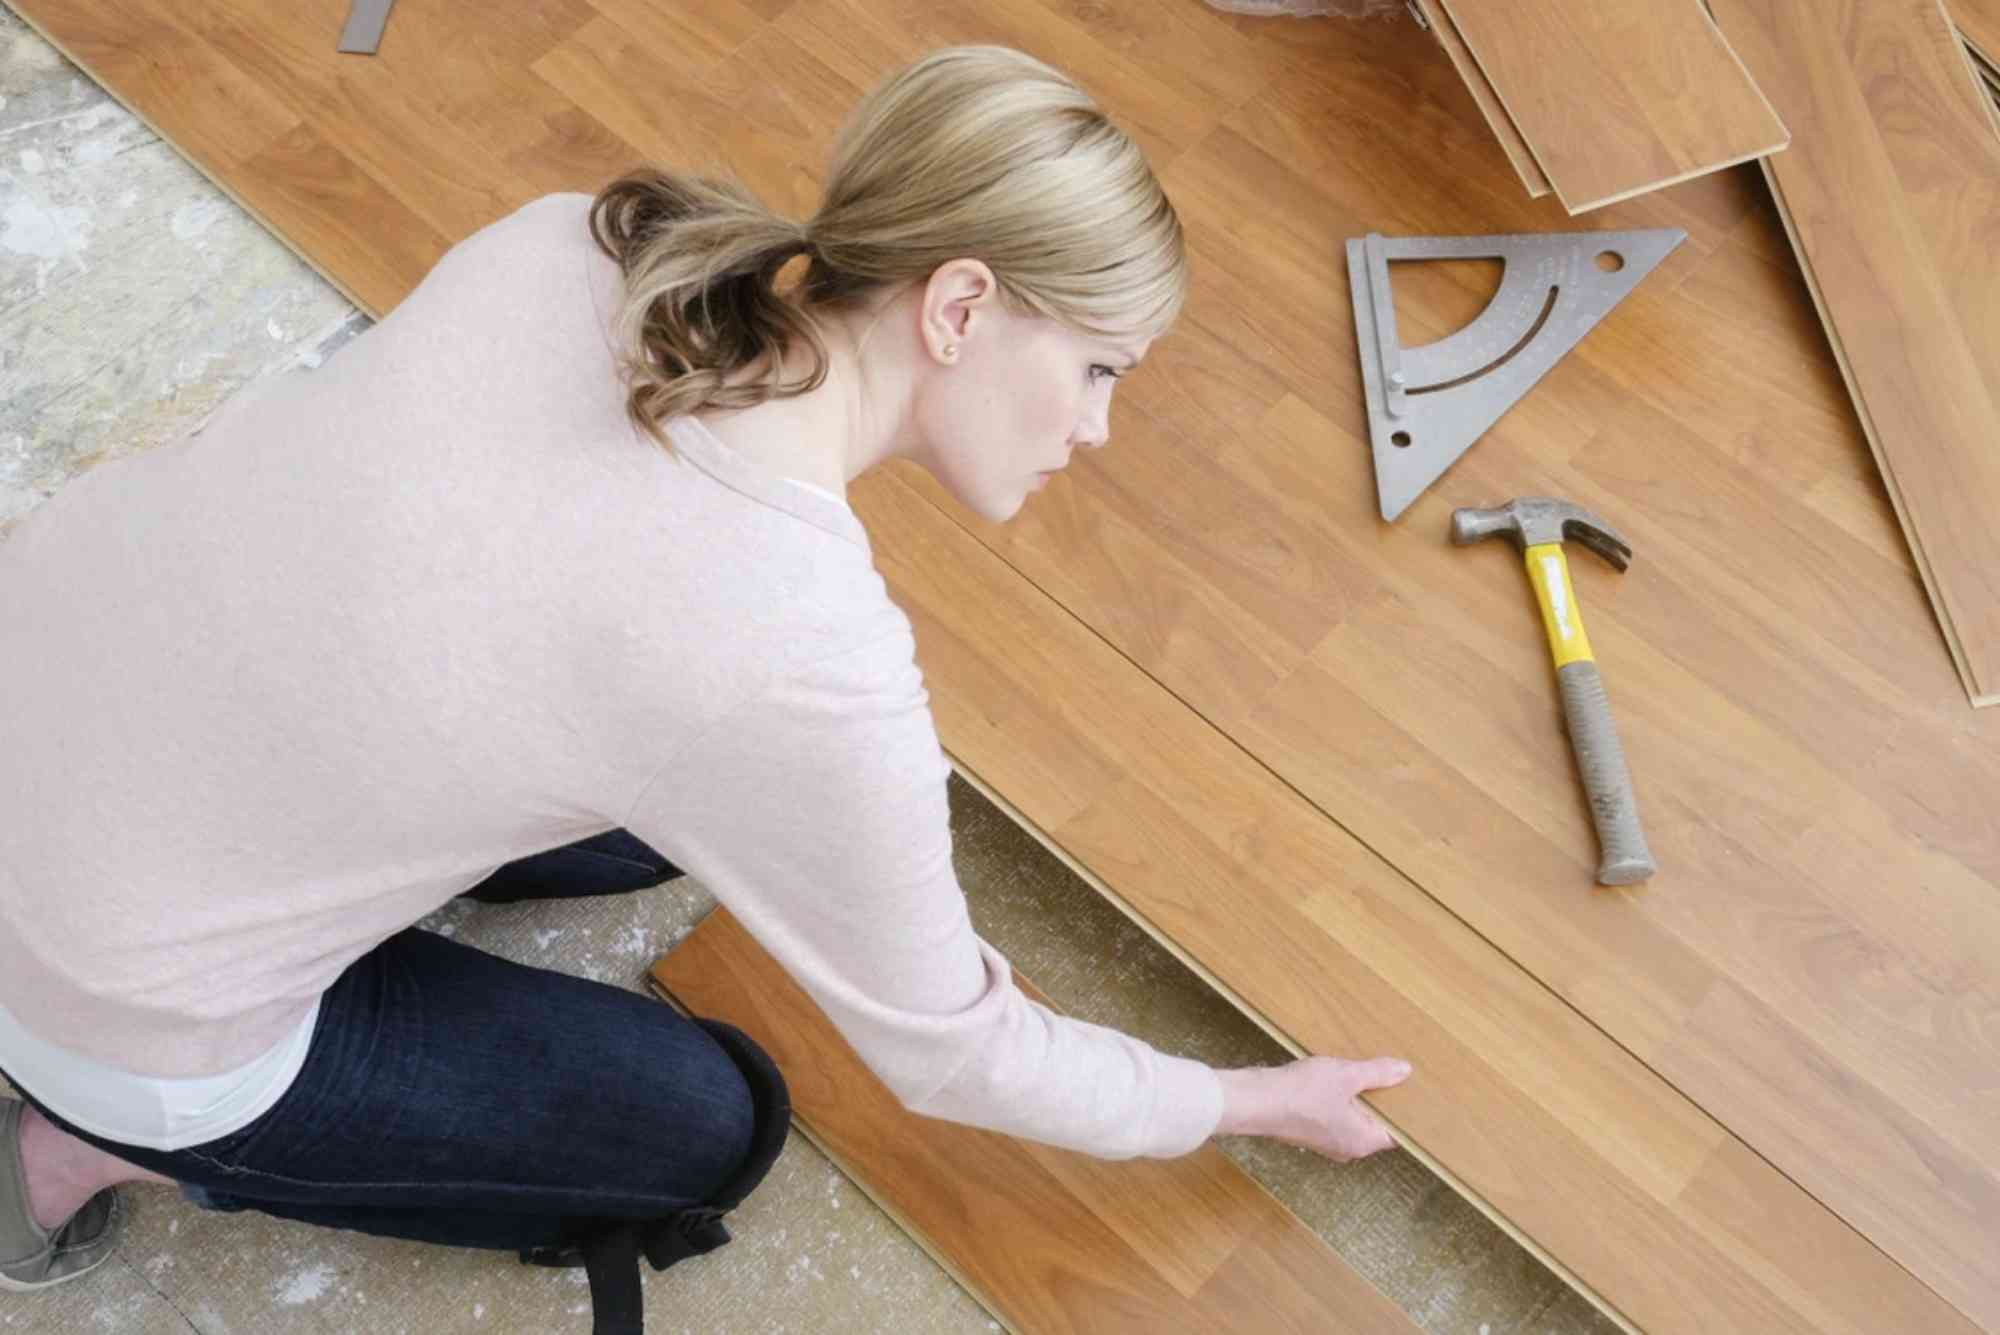
Install the First Row
Start along the longest wall. Use spacers to leave a small expansion gap (around 1/4 inch) between the floor and the wall. This allows for natural expansion. Lay the first row of planks tongue-side facing the wall.
Continue with the Next Rows
Fit the next row’s tongue into the groove of the first row and lock them together. Tap gently with a mallet and tapping block to ensure a snug fit. Stagger the joints between rows to create a more natural and stable pattern.
Cutting Around Corners and Obstacles
You’ll likely need to cut planks to fit around door frames, vents, or corners. Measure carefully and use a jigsaw or circular saw for precision cuts. Always wear safety glasses when cutting.
Install the Final Row
When you reach the last row, you may need to trim the width of the planks to fit. Remember to maintain the same expansion gap along the wall.
Finishing Touches
Once all planks are installed, remove spacers and install baseboards or quarter-round molding to cover the expansion gap. Clean the surface and enjoy your new floor.
Common Mistakes to Avoid in DIY Flooring Installation
Even beginners can achieve professional results by avoiding a few common mistakes. Never skip subfloor preparation; an uneven surface will cause creaking or gaps. Don’t forget expansion gaps, as floors need space to expand with humidity changes. Avoid rushing cuts and measurements — accuracy ensures clean seams and a balanced layout. Finally, always double-check that your planks are fully locked together before moving on to the next row.
Tips for a Professional Finish
A few expert tips can make your DIY flooring installation look like it was done by a pro. Always start from the corner opposite the main door so you work your way out of the room. Keep tools within reach to maintain momentum. Clean as you go to avoid dust buildup that can affect adhesion or locking systems. After installation, protect your new floor with felt pads under furniture legs and avoid heavy traffic for 24 hours.
Maintaining Your New Floor
Proper maintenance extends the life of your flooring. Sweep or vacuum regularly to remove dirt that can scratch the surface. For vinyl and laminate floors, use a damp mop and avoid excessive water. For hardwood, use wood-safe cleaners and consider refinishing every few years. Avoid harsh chemicals that can damage the protective layer.
Cost Considerations for DIY Flooring Installation
One of the biggest motivations for DIY flooring installation is cost savings. On average, professional installation can add $2–$5 per square foot to your total cost. By doing it yourself, you only pay for materials and minimal tools. Vinyl planks can cost between $1.50–$3 per square foot, while laminate ranges from $2–$4. Hardwood and tile are more expensive but still cheaper when installed independently.
Environmental Impact of DIY Flooring Installation
DIY flooring can also be more eco-friendly. You can choose sustainable materials like bamboo, cork, or reclaimed wood. Additionally, installing it yourself reduces transportation and labor-related emissions. Many brands now offer recyclable or low-VOC flooring options that are better for your indoor air quality.
FAQs
1. What is the easiest type of flooring to install for beginners?
Laminate and vinyl plank flooring are considered the easiest options for DIY flooring installation. They come with click-lock systems that allow you to snap pieces together without nails or glue, making them perfect for beginners.
2. Do I need to remove old flooring before installing new floors?
In most cases, yes. Removing old flooring ensures a smooth and level surface, which is essential for proper installation. However, vinyl or laminate can sometimes be installed over existing floors if they are flat and in good condition.
3. What tools do I need for DIY flooring installation?
Essential tools include a tape measure, utility knife, rubber mallet, spacers, a tapping block, pull bar, and a saw for cutting planks. Having knee pads and a level can also make the job easier and more comfortable.
4. How do I prepare the subfloor before installing new flooring?
Clean the subfloor thoroughly, remove any debris, and ensure it’s completely dry and level. Fill in low spots and sand down high areas. For concrete subfloors, use a moisture barrier to prevent damage to the flooring.
5. Can I install new flooring over concrete?
Yes, you can install flooring over concrete, but preparation is key. Use an underlayment or vapor barrier to protect your flooring from moisture. Floating floors like laminate or vinyl planks work best over concrete.